Edible Gardening!

Photo Credit: DOHA Family
Step One
Plan Your Garden
Tomatoes basically grow themselves if they have lots of sunlight, and preserve well, but they need a lot of space. Peppers can be especially can be challenging and take a while to get going, easily 6-8 weeks in Northern climates. Being from Ohio, where our springs are unpredictable, I like to start my pepper seeds as early as Feb-March. Check out The Farmer's Almanac to figure out when you should start your seeds, plant outside, and harvest in your area.
|
If you're starting your plants from seed, you're going to need to figure out what you want to grow at least a few months in advance. Ask yourself: What are you interested in growing? What size harvest do you want (...and what will you do with excess because that can happen)? How much space do you have for plants? How much sunlight does your yard get? Do you want something easy or you want a challange?

Photo Credit: Plant University
|
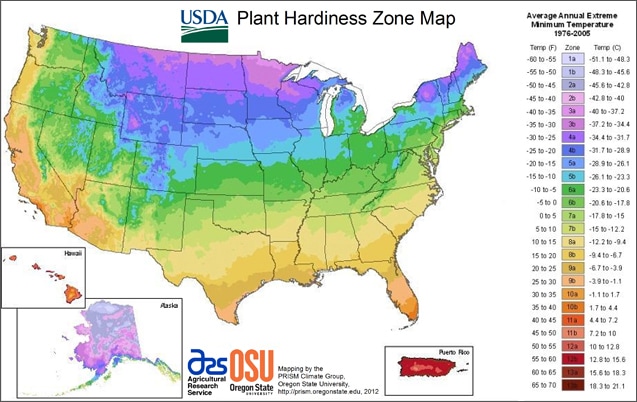
You can grow most things in any climate, but when / how you grow it is determined by your hardiness zone. Cool loving crops may be grown in the spring and fall in the north, but the winter in the south. Tropical plants in the north will have to be brought in for the winter. Some plants will be annuals in the north, but perennials in the south. These are just a few things to consider. Check out the map from USDA below and find your Hardiness Zone.
Step Two
Gather Supplies

If you've already decided to just buy plants, you can skip to step 4.
If you're on the fence, check out the pros / cons below for starting from seed. Remember, it's not all or nothing. You can buy plants this year and buy seeds next year. You can buy some seeds and some plants. There is no right or wrong way. I truly believe once you begin starting your own, you'll never go back. The sense of pride is incomparable.
☼If you choose seeds that can be directly sown, like zucchini and beans, most of the cons below don't even apply☼
|
Pros
• Saves Money! A single plant can cost as much as a whole pack of seeds. Depending on the size of the plant, it can cost double, triple, or even more! My local hardware store sells seed packs for 50¢ each, while a large plant can ring up at $10. You can also harvest your own seeds from heirloom plants and never have to buy any again (unless you want new varieties). Even then, there are lots of swap pages on facebook.
• Huge Variety. Buying seeds in store gives you hundreds of options, buying online gives you thousands. For example, In store you may be able to find a 5 types of tomatoes, while rareseeds.com offers so many varieties that they've sorted them into 11 CATEGORIES!!! |
Cons
• Takes time. Seeds don't start overnight. Some take a few days, but peppers can actually take weeks to even sprout.
• Requires space. When you've got a half dozen flat of seeds, you'll need somewhere to keep them. A small, indoor greenhouse will save space since you can store flats vertically. • Can be tricky. You get a pack of 20 seeds, don't expect 20 plants (though it certainly can happen). Tomatoes and cucumbers have a pretty high germination rate, peppers can be lower because they're finicky. 
Photo Credit: Texas Ready
|
To start seeds you're going to need some supplies.
|
1. Seeds. Obviously. You can buy them at a garden center or nursery. This gives you the benefit of supporting a local business and a chance to talk to people who know about gardening. Seeds can also be purchased at a big box hardware store and even places like Walmart and Target. You're really going to find the largest selection online though. My favorite online stores to buy seeds from are:
|
Photo Credit: Kings Seeds
|
SeedsNow.com - They have cheap seeds starting at 99¢ a pack.
Baker Creek Heirloom Seeds - HUGE Variety, flat rate shipping.
Territorialseeds.com - HUGE variety and unique seeds.
Parkseed.com - Great sales a different stuff than the two above.
Baker Creek Heirloom Seeds - HUGE Variety, flat rate shipping.
Territorialseeds.com - HUGE variety and unique seeds.
Parkseed.com - Great sales a different stuff than the two above.
|
2. Containers. First you're going to need something to grow your seedlings in. There are tons of options like plastic cells, expanding pellets, coconut coir, peat pots, etc.
Though plastic cells are the cheapest and most compact, I personally don't use them with plants that are sensitive to transplant shock, like peppers. They're perfect other plants like tomatoes. I personally prefer to use the hex style because they develop deeper roots and seem to pop out easily. What I don't like about them is they're not as reusable as they seem because they often get damaged when popping out plants. |
Photo Credit: The Garden Oracle
|

Photo Credit: StokeSeeds.com

Photo Credit: Mr Brown Thumb
|
Biodegradable options like expanding pellets and coconut coir /peat pots are great because they make transplanting go more smoothly, they break down in the soil, and don't restrict root growth. I also like that there is no wasted plastic and as my family is trying to limit unnecessary waste, they're better options for us.

Photo Credit: The Home Depot
|
Some gardeners even diy with egg cartons, egg shells, or paper towel rolls. These are great for saving money as well as repurposing things that would otherwise be trash. All 3 of these can be planted directly into the ground so you minimize transplant shock. What's cool about egg shells is that they provide nutrients to seedlings. Seem a little too tedious? Just add the shells to your garden or composter.
Check out this awesome guide on making pots out of newspaper.
Check out this awesome guide on making pots out of newspaper.
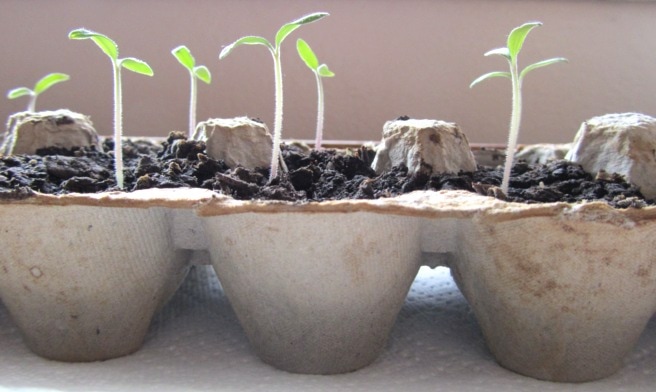
Photo Credit: The Neat Nook
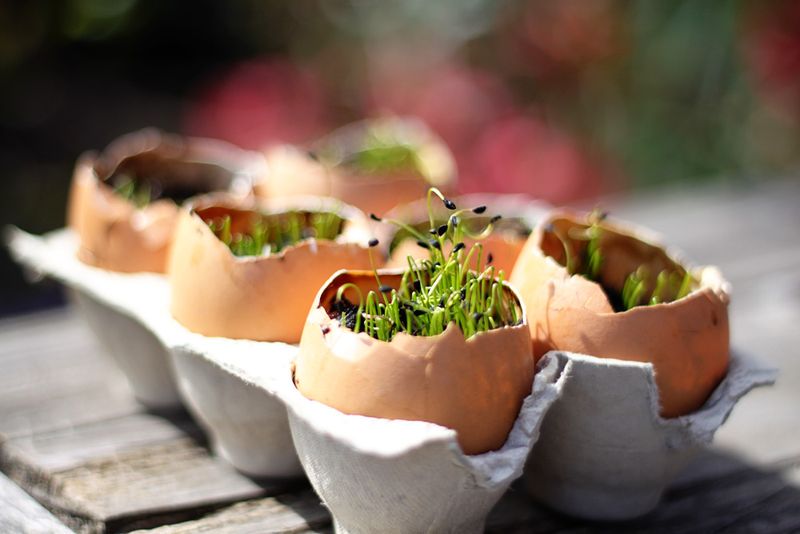
Photo Credit: Porchside Gardening
|

Photo Credit: A Little Campy
|
|
There is mixed information about the sustainability of peat moss, so do your own research and make a decision you feel comfortable with.
I personally avoid the pots because there are so many other options, but choose to use the soil version because it's an great amendment for clay soils. |
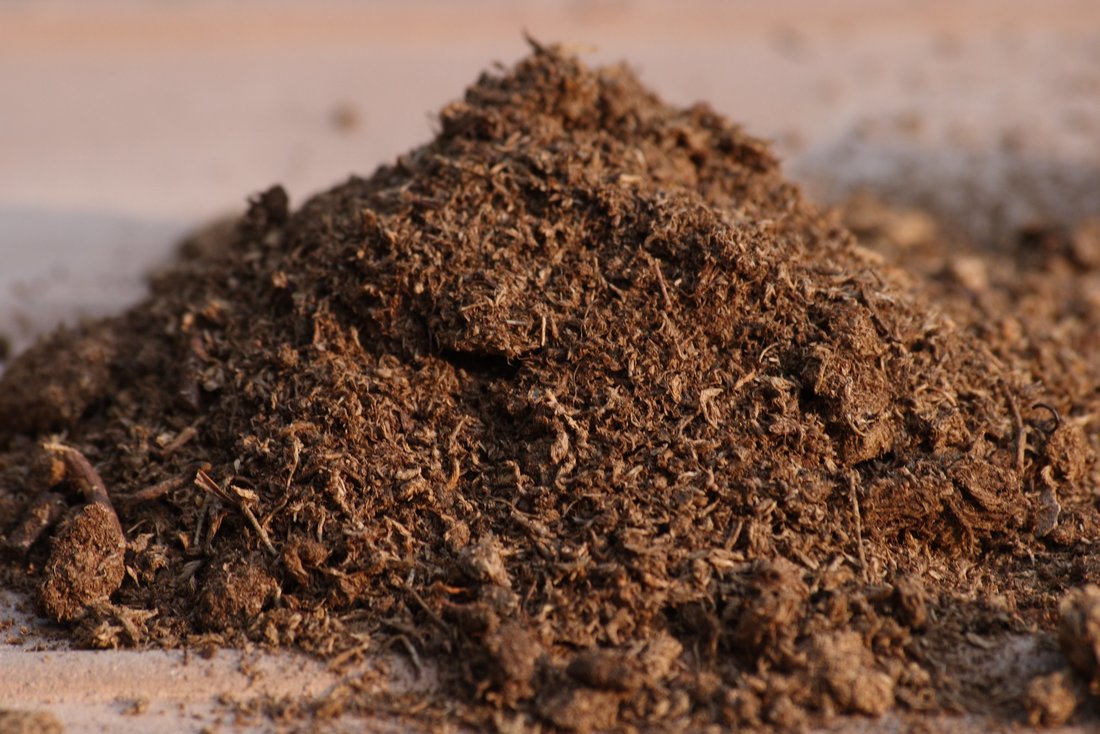
Photo Credit: Cactus Lover
|
|
3. Growing Medium. You're also going to need a growing medium or, uh, dirt. I usually use a seed starting mix because it's easy, but you may want to experiment and find what works for you. When I was starting my Ghost and Scorpion peppers 2 years ago, I stumbled across an awesome article that compared different types of soil by seeing how well the seeds responded and grew in it. I urge you to check it out here. can make your own using peat/coir, perlite, and vermiculite. Learn more about making your own and how to do it yourself here.
|

|

Photo Credit: Hawaii Gardening
|
3. Watering can. You don't actually have to use a traditional watering can though. My first year I used an old milk jug with holes drilled in it, but it was too slow so I ended up cutting the top off and using it like that.
I recently discovered a post showing you how to use an old laundry detergent bottle. The lid is thicker and has a larger surface area allowing for more holes that are larger. I think that would solve a lot of the problems I had. Right now I am using a 5 gallon bucket with a bowl. I bottom water so the fast flow isn't an issue. |
4. Heat Mat / Grow Lights. Though I think a heat mat is totally optional, and I haven't had the best of luck with them myself, I think the lights are necessary. You don't need a fancy grow lights to get started with seeds, fluorescents will work just fine. Many people you shop lights. Those are the long, tube shaped ones. Other people, like me during my first year, just use spiral CFLs at 5000k brightness.

Photo Credit: Inside Edison
|
5. Garden Tools. At this stage, I only use 2 tools and they're both things you probably already have at home. I use an ice cream scoop for dirt because I am cheap and the size is perfect (my kids think it's hilarious). I also use a pair of scissors for trimming and pruning.
|
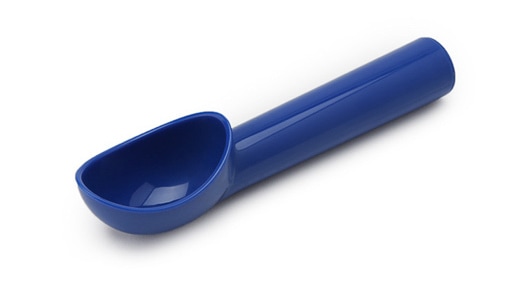
Photo Credit: Hollar
|
Once you move your plants outside you're going to need some real tools.
•Large shovel for digging and turning dirt (if you don't have rototiller)
•Small shovel for planting
•Hand cultivator for weeding and loosening soil
•Pruners/Shears for trimming plants
•Hose with trigger nozzle for watering
•Large shovel for digging and turning dirt (if you don't have rototiller)
•Small shovel for planting
•Hand cultivator for weeding and loosening soil
•Pruners/Shears for trimming plants
•Hose with trigger nozzle for watering
Step Three
Start Seeds
Once you have your supplies, starting seeds is easy. Everyone has their own way, but this is mine. These are not hard a fast rules, but these are what works for me. This is only for seeds that need to be started indoors. If you're directly sowing (planting seeds directly into the garden), wait until step 5 when it's time to move plants outside.

Photo Credit: Utah Stories
1. Pour dirt into a large bowl. Add more than you think you need. It shrinks when wet.
2. Slowly add water to dirt while mixing so it gets evenly damp.
3. Scoop dirt into pots.
4. Plant seeds. Read packet for depth. For tiny seeds, just sprinkle a little dirt over them.
5. LABEL YOUR POTS. Seriously. Just do it. You're not going to remember.
6. Lights. On 12. Off 12. I suggest a timer.
Don't let your seedlings dry out. They can wilt very quickly. I prefer to bottom water because the plants themselves are so fragile.
Step Four
Pick your Plot and Prepare the Soil
|
Most vegetables need full sun, which means 6+ hours a day. Others, like lettuce, prefer partial sun. Having the right amount of sunlight determines if they will thrive. Find out how much sun your plants will need and scope out the perfect place. Once you know the where, the soil needs to be prepared. If your soil is already rich and and weed free, all you'll need to do is turn or loosen the soil. For those, like us, who are not so lucky, you'll have to do some amendment.
Signs you have good soil? Look for rich, workable soil with lots of worms. If your soil is hard, plants won't be able to grow deep roots and worms won't be able to move easily. Worms are important because they aerate soil, help water get in, and overall better the soil quality.
|

Photo Credit: Easy Veg Growing Guides
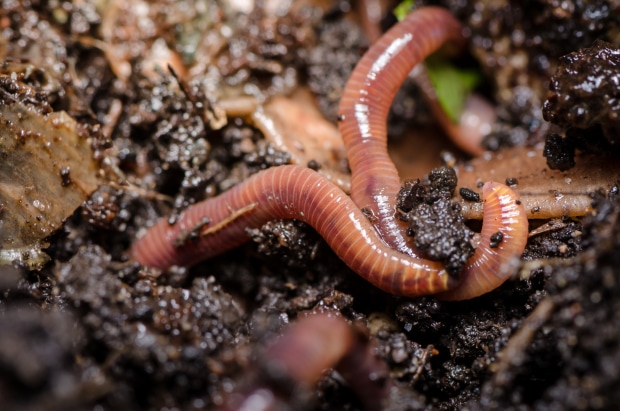
Photo Credit: Never Enough Thyme
|


|

|
When we moved into our house 2 years ago, I was so excited to start a garden that spring only to find out the soil was solid chunks of clay, mulch, and rocks with very little nutrients (and notorious for weeds). The 2 pictures on the left are what our dirt looked like our first year. It was either rock hard or swampy. Yeah, it was that bad. It was almost completely unworkable.
Part of this was caused because the previous owners had a shed where I wanted the garden to be. The shed sat on top of landscaping tarp and killed everything beneath it. For years nothing was given back to the soil and that kind of thing takes years to fix.
The second year we sectioned off the garden with landscaping timbers then bought cheap topsoil to raise it up several inches. This eliminated the sitting water problem that had drowned plants the year before. We used some high quality dirt, peat, and compost to mix in with the topsoil. We were also lucky enough to be able to get a truck load of aged horse manure from a friend of my aunt.
We even added a few more planter boxes which I prefer to use for peppers. The soil stays a bit warmer, drainage is better, and they grow deeper roots than they would in our clay soil. |
We started by turning the soil, adding peat, and many bags of garden mix. We also started composting and putting that in as it broke down. Billy built me a few raised garden beds, but most of it was ground level. After a very wet spring, we realized the area was the lowest point in our yard so whenever it rained the water would just sit.
In the Fall we took all of the leaves from our oak tree and covered the garden to kill the weeds and reintroduce organic material into the soil. 
|
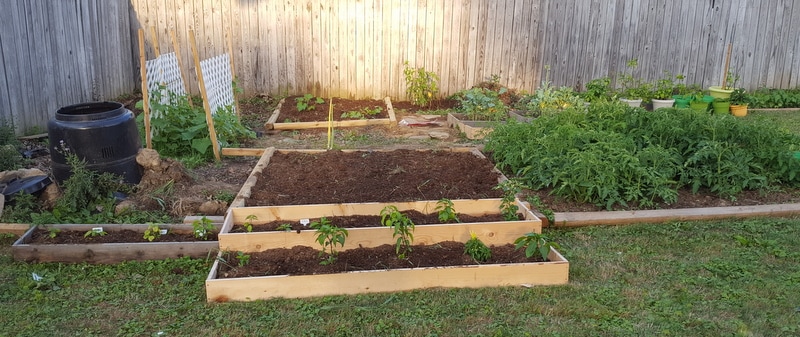
Our soil improved leaps and bounds between our first and second year. If you want to learn more on how to amend your soil, check out these articles from HGTV, Dummies, and Never Enough Thyme.
Step Five
Plant When Weather Is Right
The date when you move your plants outdoors will vary greatly by where you live, check the Farmer's Almanac to find your date. For here in Ohio, not everyone agrees when it's safe to transplant. Some people do it in May, others in June. I like to wait until July because our springs are so wet and unpredictable.

Photo Credit: Dovetail Gardens
To transplant your seedlings outside, you should harden them off. That just means you move them outside for a few hours every day. Keep them in a sheltered area and gradually increase how long they stay outside. Once they're hardened off, it's time to move them into the ground. If you planted in a biodegradable pot, this part is easy. Dig a hole, insert the pot, cover it. Done. If you used a plastic container be very careful not damage the main stem when you pop them out.
Step Six
Support, Weed, Prune, Pest Control
Obviously you need to make sure your garden isn't being under or overwatered and fertilize as needed, but there are a few things that may be less obvious.
Support

My Garden 2016
|
There are a lot of vegetable plants that do better with support of some kind.
If not staked or caged, tomato plants will grow out instead of up and turn into bushes. Last year our branches collapsed then rooted into the ground and tangled up with nearby plants. It was a mess. Way too late into the season I used yarn to tie the plants to wood posts. Then I cut off all leaves and non-productive branches, and only left foliage at the top. 
Photo Credit: Greeden Tomato Cage Company
|
Tomatoes aren't the only plants that could use a little extra support. Vining plants, like beans, cucumbers, and squash save tons of space when they grow up a trellis, arch, sticks, or rope. This also helps keep your precious veggies off the ground.
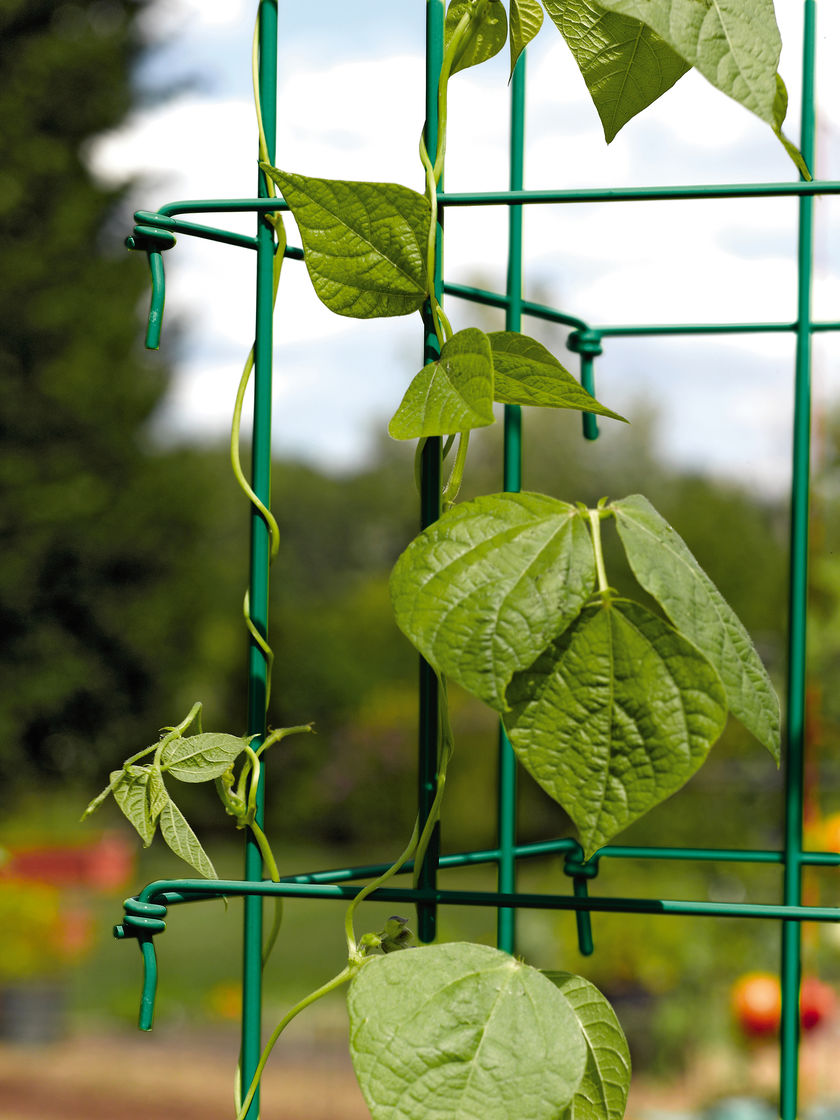
Photo Credit: Gardener's Supply
|

Photo Credit: TwoSistersGardening
|
|
If you're feeling creative, you can also coax the plants to use their innate climbing nature to turn create a focal point in your garden like this bean teepee and gourd tunnel. If you have kids or animals this is also an amazing opportunity to offer some shade (and fresh lunch for the kiddos).

Photo Credit: The [Grow] Network
|

Photo Credit: Seeds Now
|
Seeds Now has a great little blog post on How to Build a Vine Tee-pee.
Weeding

Photo Credit: Martin Pot
|
Photo Credit: Etsy Shop CraftyWinds1
The first of which is weeding. With such healthy soil, your edibles won't be the only thing growing. Expect lots of weeds and they will get out of hand very quickly if not pulled frequently. Trust me, do a little bit every day and it won't seem so bad. Waiting till everything is overrun will make it way too overwhelming.
|
Pruning
There are many reasons why one might want to prune their plants. Maybe to shape their plants like the topiary elephants below, or maybe to train them to grow a certain way, like up a trellis, or to get them to stay small. Pruning also helps increase air and light to the plant. In the case of many readers here, pruning saves space and can increase quality of yields. The jury is still out on whether or not vegetables should be pruned, experiment for yourself and see what works. Tell me what you think in the comments below.

Photo Credit: Planet Property
|
Billy has a phrase he likes to use to describe evolution, "things don't evolve to be the best, they just evolve to be good enough." I think that describes garden edibles pretty well. They don't always grow in the most efficient way. They may only grow well enough to ensure they leave seeds for the following year. If you want a better harvest of larger, healthier fruits and vegetables, your plants need your help!
|
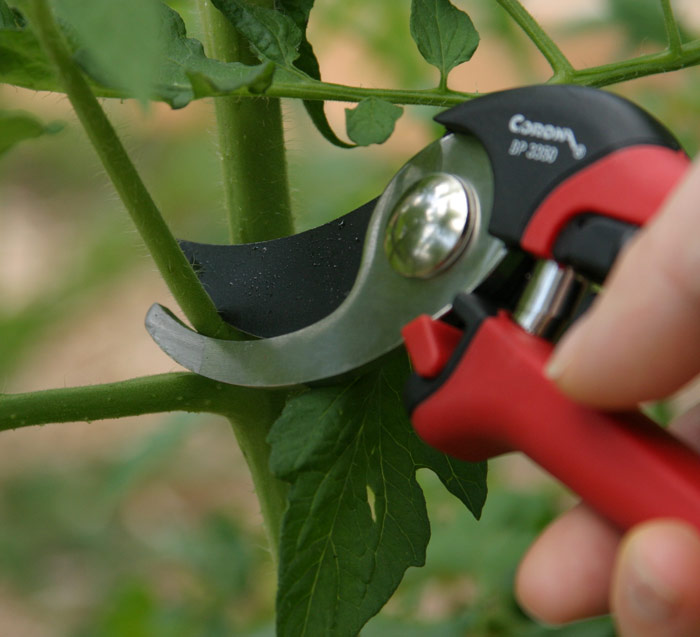
Photo Credit: High Mowing Seeds
|
Plants create way more leaves, branches, shoots, etc than they actually need. Sure they need leaves for photosynthesis, but that extra foliage takes away energy and nutrients from the plants. By giving your plants a trim you can focus their energy on what is important to you: harvestables.

Photo Credit: Fix
An unpruned plant may produce a larger harvest overall, but the the fruits themselves will be smaller, take longer to ripen, and leave many unripe at the end of the season. I waited too late last year to prune and was left with probably two 5-gallon buckets of unripe tomatoes in the fall.
The main ways to prune edibles is to pinch off extra flowers, remove foliage at the base of the plant and damaged parts of the plant, and to reduce crowding of fruits and vegetables so that what's left behind can grow properly.
|
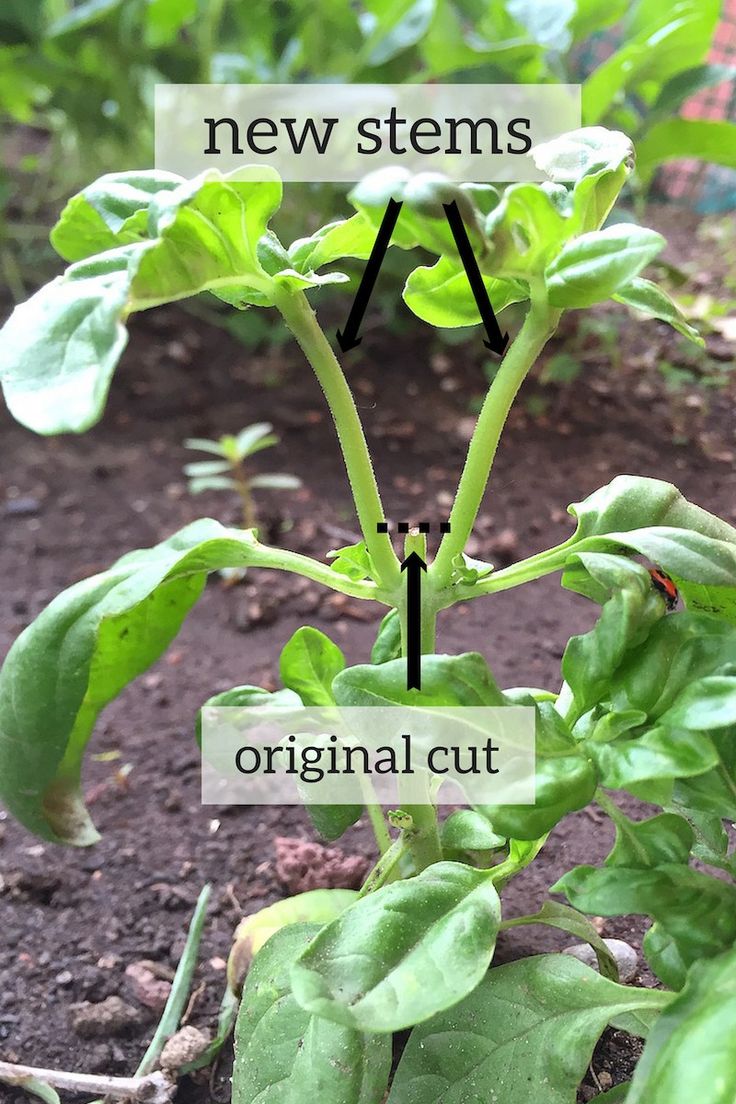
One thing I like to prune is my window basil. It might seem silly to cut leaves and stems off a plant that is harvested for its leaves, but unpruned it grows tall with only one main stem. Like the picture on the right, when the top is cut off the top of the plant, two new stems will appear in its place creating a bushier plant with more leaves.
A plant requires energy to grow so it only makes sense to remove damaged branches, leaves, and fruit and leave behind only what is healthy so you have the best harvest possible.

Photo Credit: WikiHow
|
Since I am not an expert on pruning by any means, check out these 3 great sites that have way more information on the whys and hows of pruning. Learn2Grow, Fix, and Organic Authority.
Pest Control
Pest control is pretty simple. Look for damaged foliage, find the source, eliminate the source.
Step Seven
Harvest
You may be wondering why I have an entire section dedicated to harvesting...I mean it is pretty easy. Find something that is ready and pick it, but here are a few harvesting tips.
|
1. When is time to pick your ripe fruits and veggies, it really helps to use kitchen shears or garden scissors to cut stems so as not to hurt the plant. I find this especially important for bush beans. I cannot tell you how many plants I accidentally uprooted or ripped off a whole branch. They're small plants and easy to damage.
|

Photo Credit: Food52
|

Photo Credit: Etsy Shop IVPeasInaPod
|
2. Remember to take a bowl or consider getting a harvesting apron. Works a lot better than using your shirt to tote veggies and then you won't get covered in

Photo Credit: Mahanandi
|
3. For some edibles, it's easy to know when they're ripe, like strawberries and tomatoes, that turn bright red or cucumbers when they reach the right size. Others it might not be as obvious. You also have to be mindful that some things can become overripe.
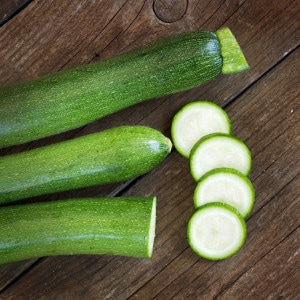
Photo Credit: Good Measure Meals
|
Cucumbers left on the vine too long may turn yellow and be bitter. The picture on the left is part of what we found waiting for us when we came home from vacation.
Zucchinis get seedy and lose some of their flavor when they grow large so they're usually better when picked small. Be careful because they grow fast. We had more than we could eat last year and I can't tell you how many times I'd say, I think it'll be fine one more day. I'd go out the next day and it had tripled in size. We were giving them away as gifts |
|
Most peppers change color to red, orange, or yellow when mature, but can be eaten before then. Last year I couldn't figure out why some jalapenos were hot and others not. Finally figured out that they get hotter the longer they stay on the plant. They're the hottest when they're veined and red.
|

|

|
Onions are a tricky since they grow in the ground and you can't see how big they are. I've found that when the green stems start to brown and fall over, they're done.
Green beans can get tough and stringy when they reach a certain size, so pick them before they get too big. Some varieties promise they will stay tender and stringless even at sizes of 10+ inches, but I haven't personally tested that. |
Step Eight
Preservation and Seed Saving
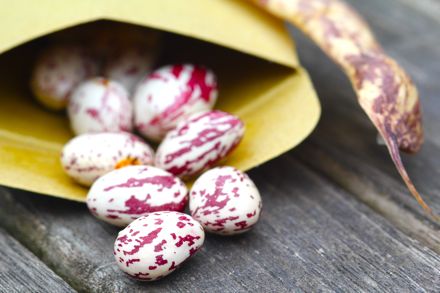
Photo Credit: Homesteader Depot
Preservation
One problem I ran into my first and second years were that we had way more food than we could eat before it went bad, but we've been experimenting to find our favorite ways to keep food fresh. Here's a few ideas of what you can do with those bountiful harvests.

Photo Credit: John Lewis

Photo Credit: Nola.com

Photo Credit: 1Zoom
|
Store ProperlyThis probably goes without saying, but storing food in its ideal location will go a long way in making it stay fresh. Some things do best on the counter or in the pantry, others in a fridge or root cellar. Check out the chart below to see how / where to store these fruits and veggies.

Photo Credit: Before It's News
Freeze |
If you're looking for a longer term storage option, considering freezing. We had tons of green beans we weren't ready to eat so we blanched then froze them. Blanching is process of boiling for a couple minutes and then submerging in an ice bath. This stops enzyme activity (think ripening and spoilage) that freezing alone would only slow.

|
Not everything has to be blanched first.
Check out PreparednessMama to see which veggies should be blanched and which ones you can skip on. For example, last summer we picked more peppers than we knew what to do with. I cut them up with tomatoes and onion and froze them in sandwich bags for chili. When Billy wanted to make chili all he had to do was pull out a bag and dump it in the pot. Freezing takes away firmness for a lot of vegetables, so this is only a good technique if you're planning to cook them. |
Dehydrating
Lots of things can be dehydrated, meats, fruits, veggies. We mainly use ours for jerkies and dehydrating peppers, but I'd love to make some dried fruit for the kids this summer. Billy eats the jerky in like a day, but the peppers last all winter...and then some. We use those for chili, homemade BBQ sauce, and daring our house guests to eat.

|
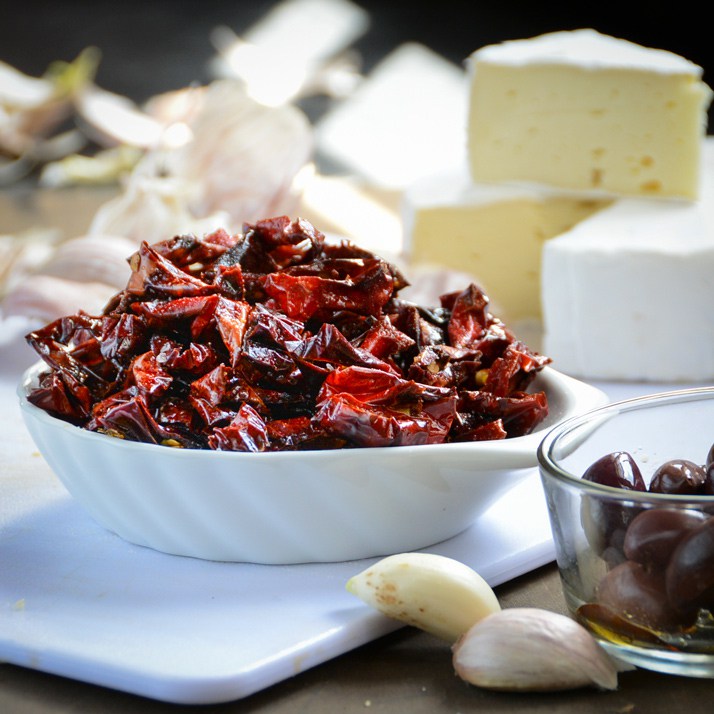
Photo Credit: Nonnas Way
|
Canning
2 techniques
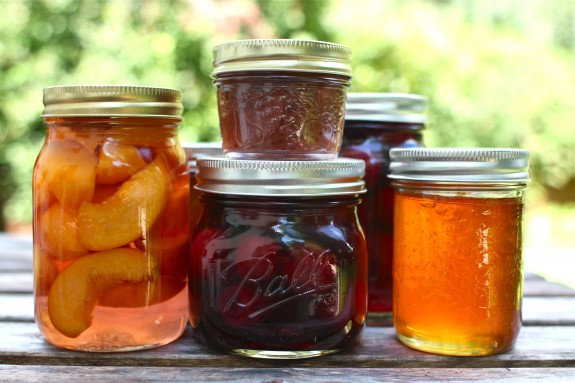
Photo Credit: Simple Bites
|
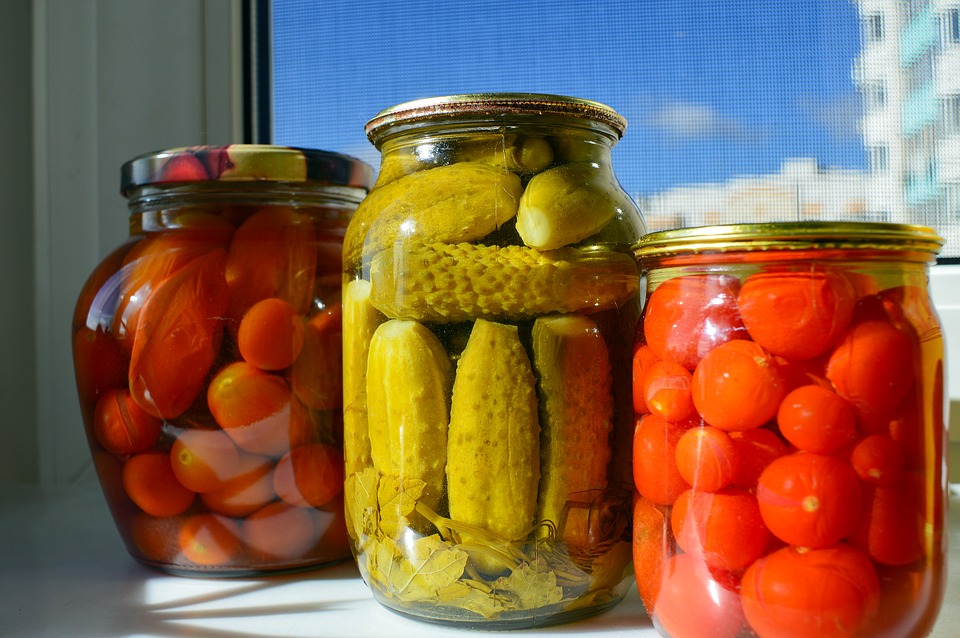
Photo Credit: Max Pixel
|
Refrigerator pickling
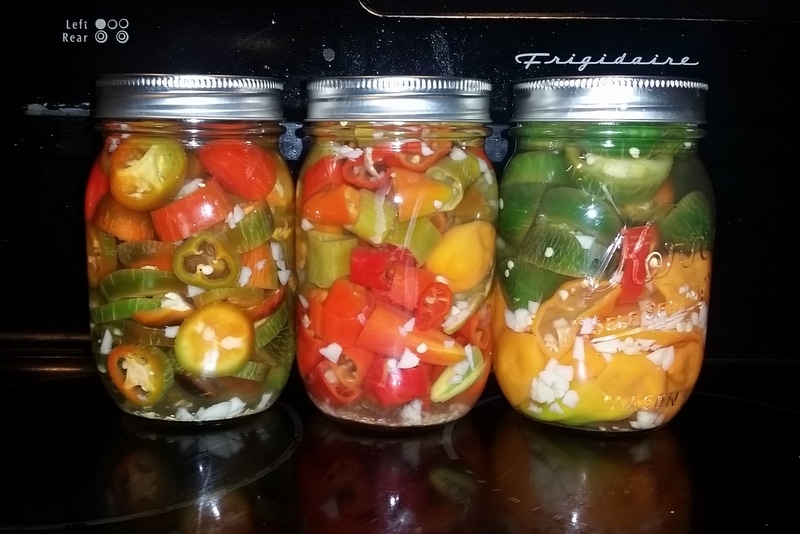
I made these awesome refrigerator pickled peppers last fall and they were a huge hit with family members and at game nights. We used Habaneros, Jalapenos, and Fish Peppers and they all turned out awesome, though a bit too hot for some tasters. Find out how to make the same ones at The Creekside Cook.
Seed Saving

Why buy new seeds every year when you can save your own? There's a big appeal there for me. From gardening the last few years I've definitely developed some favorites varieties to grow, but I also like experimenting with new plants. By the time I buy all of my usuals, I don't have much left in my seed budget to get new seeds to try. By saving seeds from the previous year I have more money to spend on different varieties and I can TRADE my excess in seed trader facebook groups so I can try even more things.
Conserving money isn't the only reason to save your own though. Seeds can be passed down through families and in communities. Many seeds will never make their way into a big box store or catalog, and are only in the possession of a handful of people. Without preserving every year, they'll simply die out.
Conserving money isn't the only reason to save your own though. Seeds can be passed down through families and in communities. Many seeds will never make their way into a big box store or catalog, and are only in the possession of a handful of people. Without preserving every year, they'll simply die out.
A note about HYBRIDS:
A note about HYBRIDS: hybrids are created when two (or more) different plants are crossed to achieve desirable traits like earliness, hardiness, size etc. The problem is seeds typically won't produce that same plant again. What tends to happen is that you'll get a plant that resembles one of the original parent plants.
A note about HYBRIDS: hybrids are created when two (or more) different plants are crossed to achieve desirable traits like earliness, hardiness, size etc. The problem is seeds typically won't produce that same plant again. What tends to happen is that you'll get a plant that resembles one of the original parent plants.
For example, I bought a type of cherry tomato and the following year got a ton of volunteer plants, but the tomatoes were about double the size and more mild in flavor. I actually prefer them like that, but the plant you get will not usually be better because why would anyone go through the work of selective breeding to sell a less desirable plant?
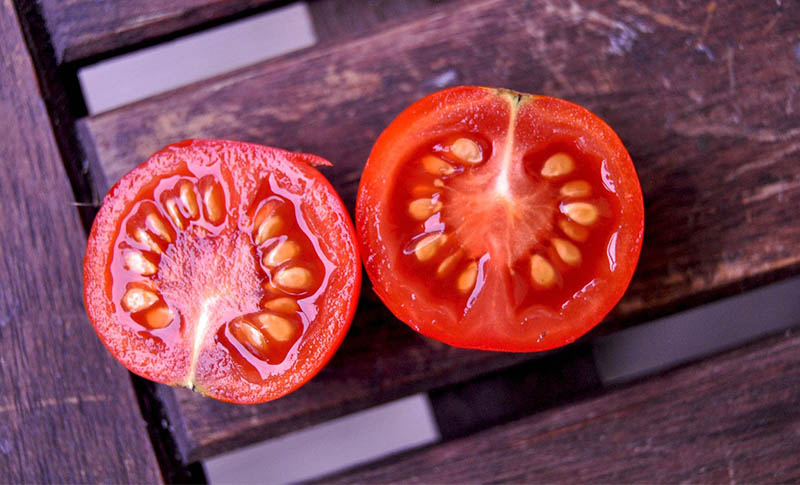
Photo Credit: Outdoor Living Today
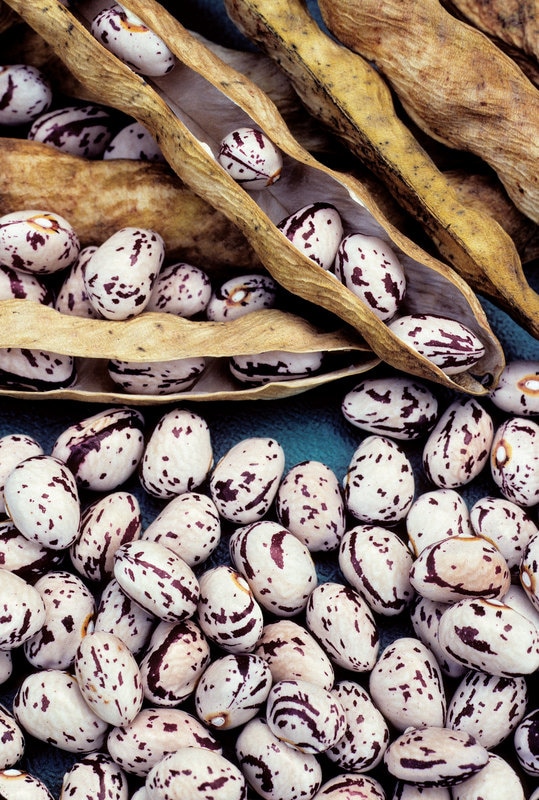
Photo Credit: Mother Earth News
Photo Credit: Livestrong
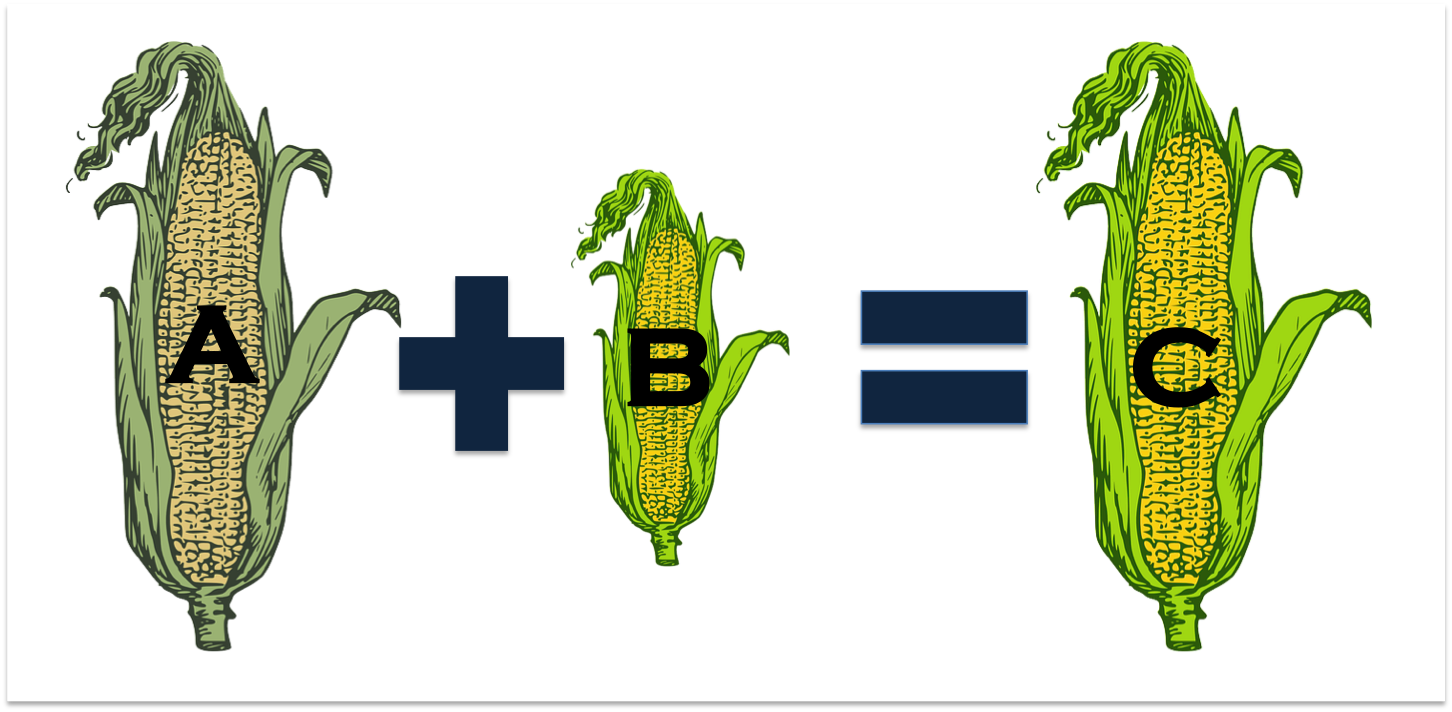
Not all seeds are mature when they're normally picked, like squashes that are picked early. Peppers need to change color before they're fully ripe. Seeds from all plants will need to be dried, either on the plant or once removed, depending on species.
I'm still very new to seed saving so I've compiled a few links that explain everything you need to know to harvest seeds from each type of fruit and veggie. Have some tips? Share below.
|
Knowing when things are going to seed is crucial in being able to collect those seeds. If you wait all summer for your onions to flower, you may be disappointed to know you're a year too early.
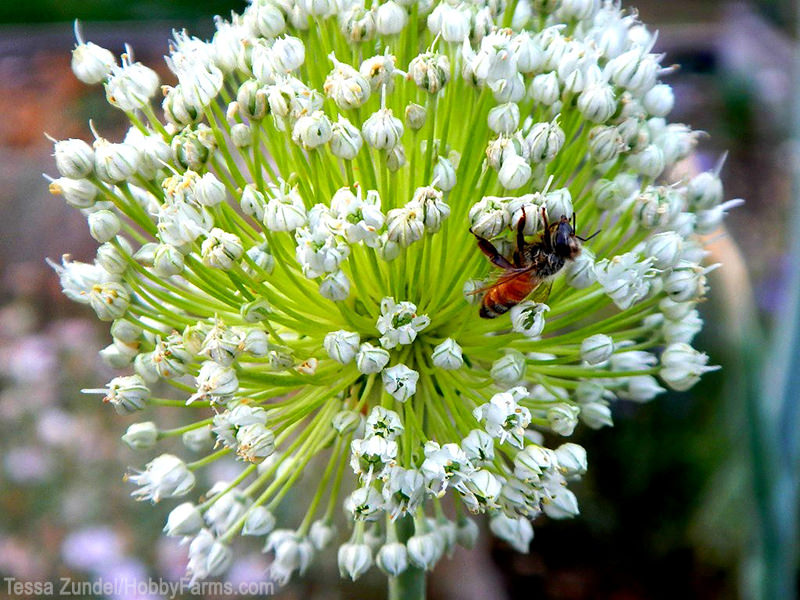
Photo Credit: Hobby Farms
Here's a quote from SeedSavers.Org guide, How to Save Seeds -
Annual, Biennial, Perennial Not all plants flower, set seed, and die in a single growing season. Those that do, like lettuce, tomatoes, and peppers, are called annuals. Biennials, such as carrots and onions, don’t flower until their second growing season, after they have gone through a cold period. Some long lived plants, like apple trees and asparagus, are perennial, surviving and flowering for many years. 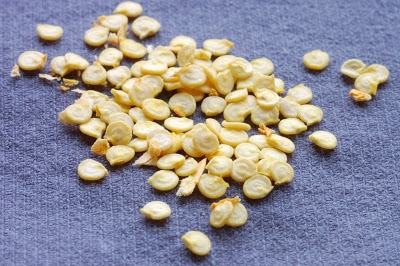
Photo Credit: Rancho Buen Dia
|
|
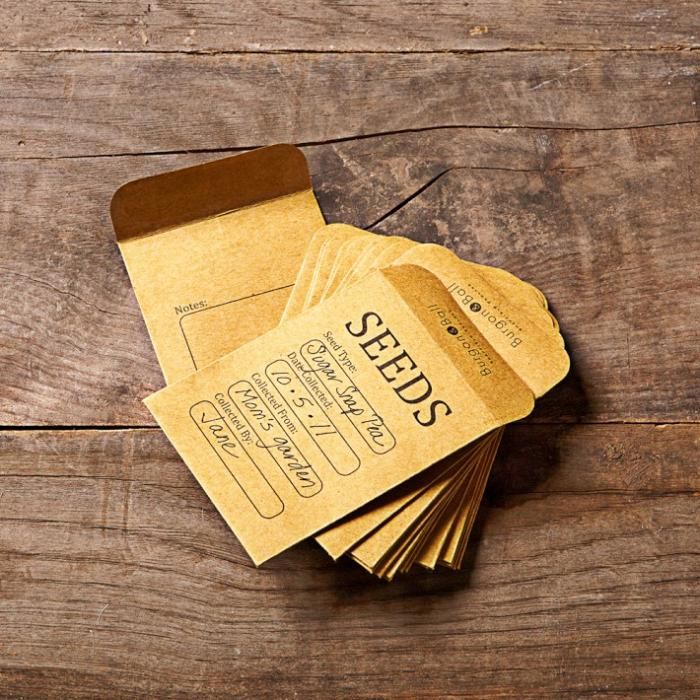
There are lots of ways to store your seeds. Last year I dried mine on a paper towel and kept them in the box. I recommend getting some envelopes though. Here are my recommendations for seed envelops. If you're looking for an economy option, Quality Park offers a 500 pack for about $12 (2-3¢ ea). Looking for something a little fancier? JAM Paper has different colored envelopes in a variety of sizes. Burgon&Ball sells the labeled envelopes pictured left.
|
